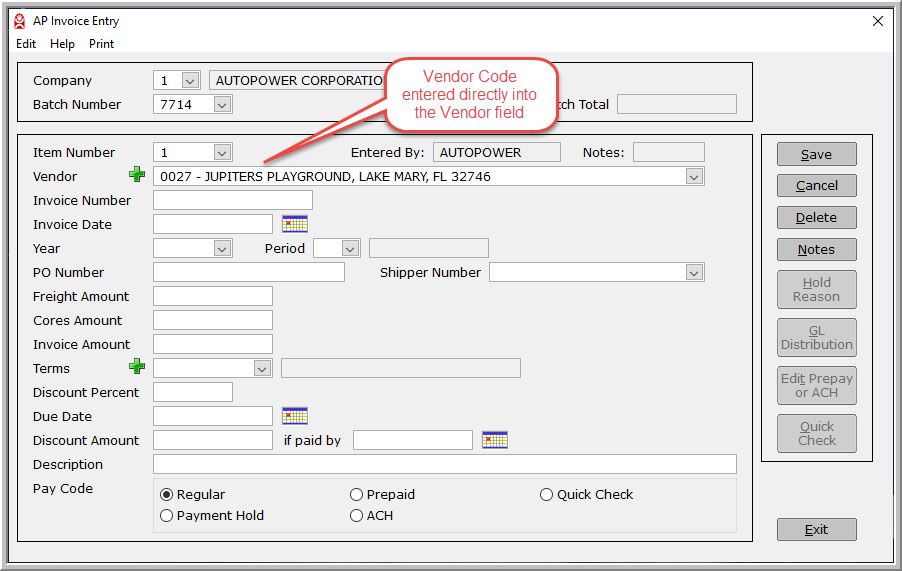
Enter the Vendor code for the invoice currently being processed. There are several options available to help you achieve that objective. If you know the Vendor code, you can enter it directly and the curser will advance to the next field.
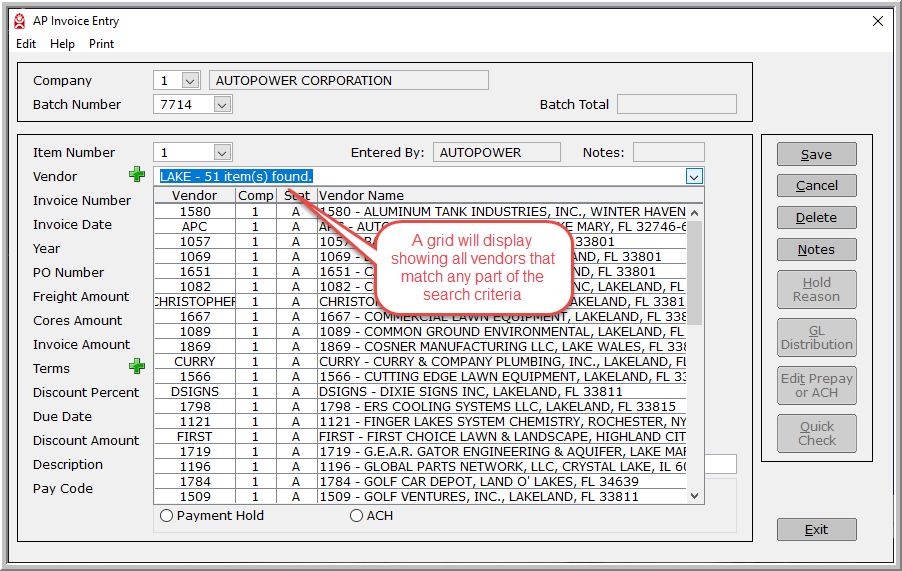
If you do not know the Vendor code, you can enter all or a portion of the name, address, city, zip or contact name of the desired Vendor and the drop-down list will be loaded with the results of the search. If only one vendor meets the criteria of the search, that vendor will automatically be loaded into the vendor prompt and the cursor will move to the next field.
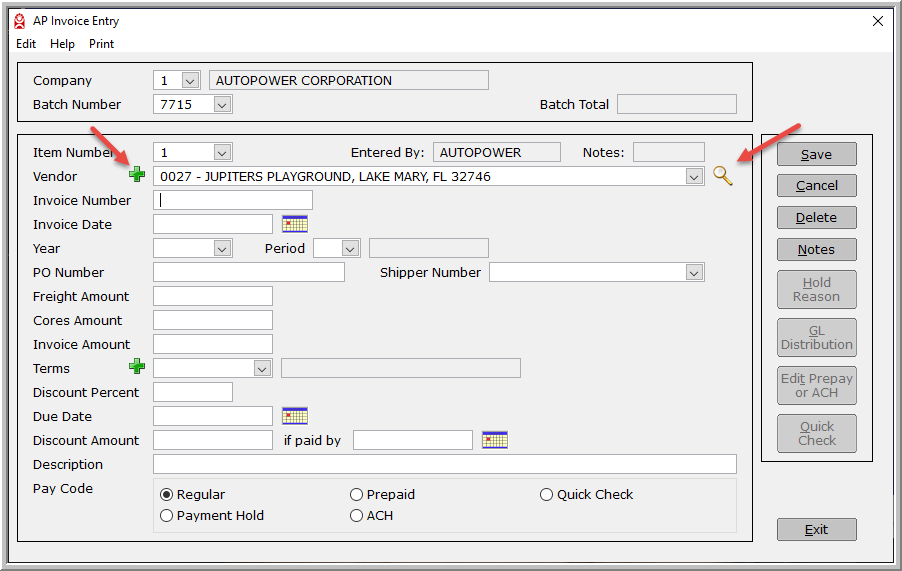
If the vendor you seek does not exist, you can enter a new vendor record on the fly by clicking the green "plus" sign to the left of the vendor prompt. After setting up the new vendor, it can immediately be used in the invoice entry screen. Setting up a new Vendor file here is the same as if you went to the AP Setup Menu and then Vendor Setup.
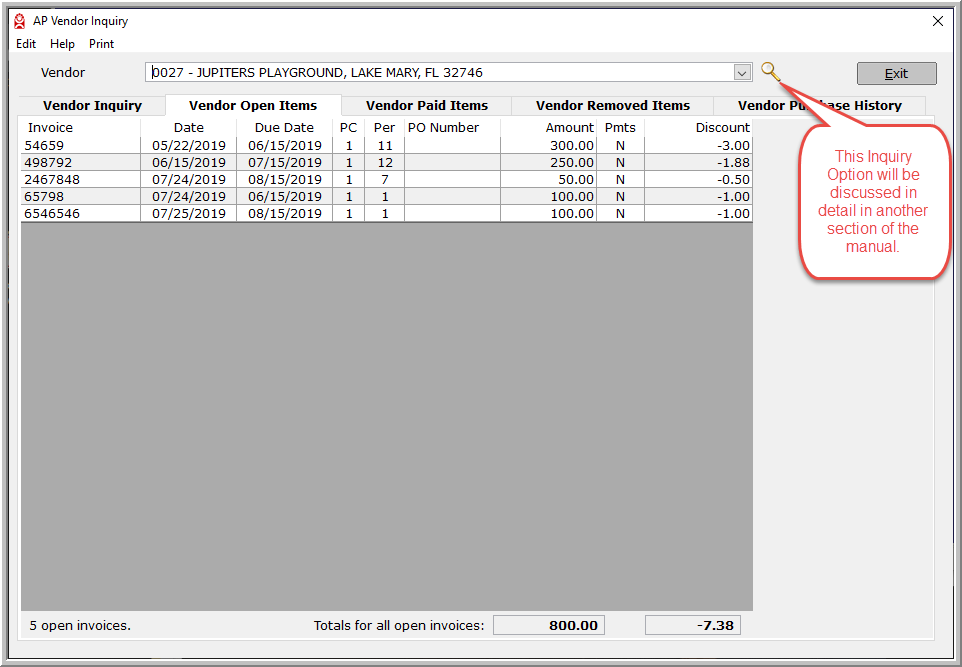
Finally, the magnifying glass to the right of the vendor prompt will take you to the Vendor Inquiry screen, where you can look up additional information about any existing Vendor. This could be helpful in determining the GL distribution used for prior invoices from the same Vendor, or to search for previous invoices or payments made to a Vendor.
![]()
AutoPower Release Notes ● AutoPower U Help Directory ● Customer Support Portal
© AutoPower Corporation. All Rights Reserved.
Copyright Notice
AutoPower Corporation makes no warranty of any kind with regard to this material, including, but not limited to, the implied warranties of merchantability and fitness for a particular purpose. AutoPower Corporation shall not be liable for errors contained here in or for incidental or consequential damages in connection with the furnishing, performance, or use of this material. The software described in this document is furnished under a license agreement and nondisclosure agreement. The software may be used or copied only in accordance with the terms of these agreements.
This document contains proprietary information, which is protected by copyright laws. All rights are reserved. No part of this document may be copied, reproduced, transmitted, or translated into another language in any form or by any means, electronic or mechanical, for any purpose, without the express written permission of AutoPower Corporation. The information contained in this document is subject to change without prior notice. Companies, names, and data used in examples herein are fictitious unless otherwise noted.