Once the invoice amount is inputted, the Invoice Distribution screen will open.
AP Invoice Distribution will auto select a Distribution or Allocation Code Template if there is one in the Vendor Setup. You can select a pre-set template from the drop-down list, or leave blank for the user to fill in the applicable GL Account, Branch, Department, Amount and Reference.
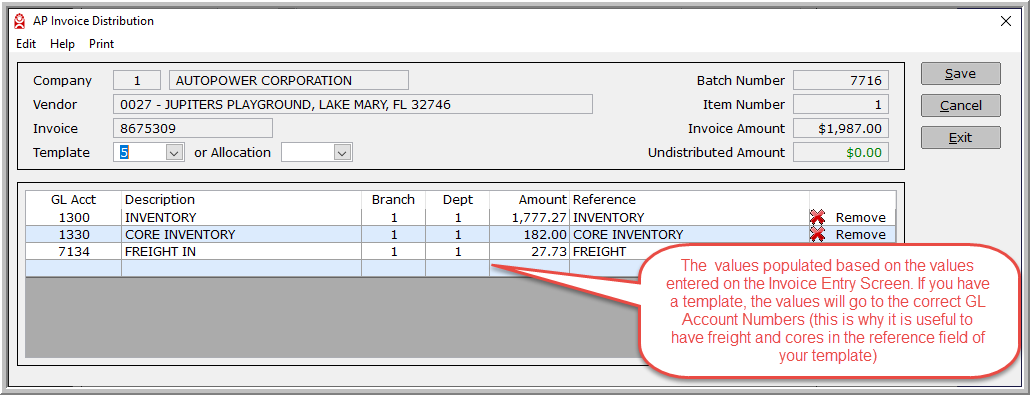
Remember, if you have a template, the GL account numbers may be defined for you already. You can always change the template number, or remove it completely.
To record the expense for the invoice, select the appropriate GL account number from the drop-down list, or you may directly enter the GL account numbers.
If you have selected a template that includes freight or core GL numbers, the invoice entry will auto populate the freight and core values, if your template includes GL numbers for freight and cores. You can always change these values if necessary.
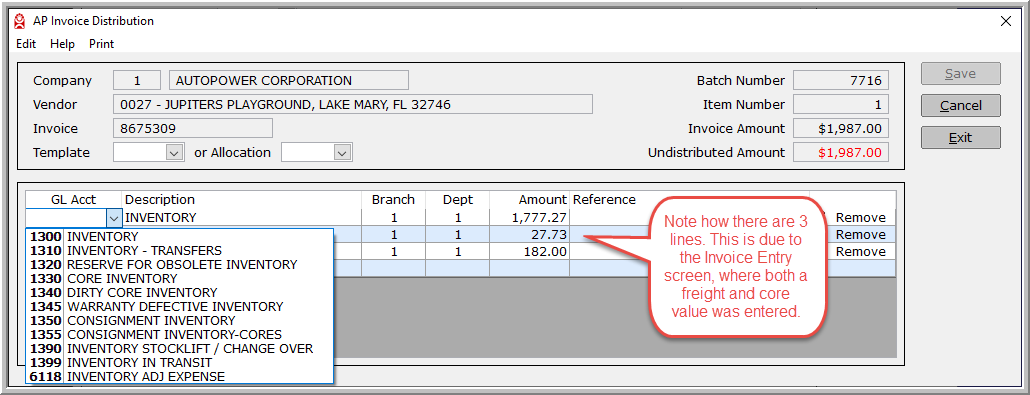
If you do not know the GL Account Number, you can enter a partial description in the description column. This will load the drop-down list in the GL account column with only those GL Account Numbers containing the description you entered.
Entering a search description that is not found within the GL Account Number description will display a message informing you that no Account Numbers are found using the description that you entered. If you are unable to find the GL Account Number based on the search description entered, tab back to the description field, or double click in the description field to enable the Backspace or Delete key on your keyboard.
In the example illustrated below, the word INVENTORY was entered in the description column.
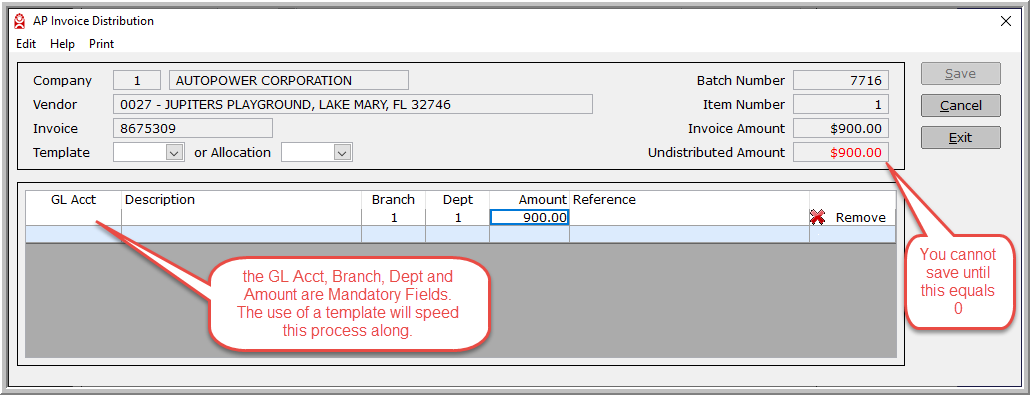
Once you have entered the GL Account Number enter in the branch and department number, or select from the drop-down list the correct branch number for the invoice being entered.
Enter the dollar amount you are applying to the GL account number. The Undistributed Amount shown represents the amount that still needs to be posted as you enter amounts for each GL account line. You will not be able to save until your Undistributed Amount is equal to zero. Clicking on the word "Remove" in the 7th column will delete the row from the table.
The reference column will default to the name of the GL Account. This can be changed. Remember, if you are using a template the description will be pre-populated. You can type over the pre-populated value if desired.
Click Save to save your Invoice Distribution. Remember, you cannot click Save until the Undistributed Amount is equal to zero. Once you click Save, you will be brought back to the Invoice Entry screen.

![]()
AutoPower Release Notes ● AutoPower U Help Directory ● Customer Support Portal
© AutoPower Corporation. All Rights Reserved.
Copyright Notice
AutoPower Corporation makes no warranty of any kind with regard to this material, including, but not limited to, the implied warranties of merchantability and fitness for a particular purpose. AutoPower Corporation shall not be liable for errors contained here in or for incidental or consequential damages in connection with the furnishing, performance, or use of this material. The software described in this document is furnished under a license agreement and nondisclosure agreement. The software may be used or copied only in accordance with the terms of these agreements.
This document contains proprietary information, which is protected by copyright laws. All rights are reserved. No part of this document may be copied, reproduced, transmitted, or translated into another language in any form or by any means, electronic or mechanical, for any purpose, without the express written permission of AutoPower Corporation. The information contained in this document is subject to change without prior notice. Companies, names, and data used in examples herein are fictitious unless otherwise noted.